Health Monitor
A wearable device that tracks heart rate, blood oxygen saturation, and step count in real-time.
Author: PASTOR Mario-Alexandru
GitHub Project Link: https://github.com/UPB-PMRust-Students/project-l00tus
Description
This wearable health monitor continuously measures and displays the user's vital signs in real time. It uses a MAX30102 pulse oximeter sensor to calculate heart rate (BPM) and blood oxygen saturation (SpO₂), alongside an ADXL345 accelerometer to detect and count steps. The collected data is displayed on a compact SSD1306 screen, providing a clear and minimal interface. Additionally, the device hosts a server, allowing the latest readings to be retrieved via Wi-Fi.
Motivation
I chose this project because I wanted to develop something that integrates both hardware and software in a meaningful way. I was especially motivated by the idea of building something that could have real-life applicability, so I decided to build a wearable health monitor, which felt like a good balance between technical challenge and practical usefulness.
Architecture
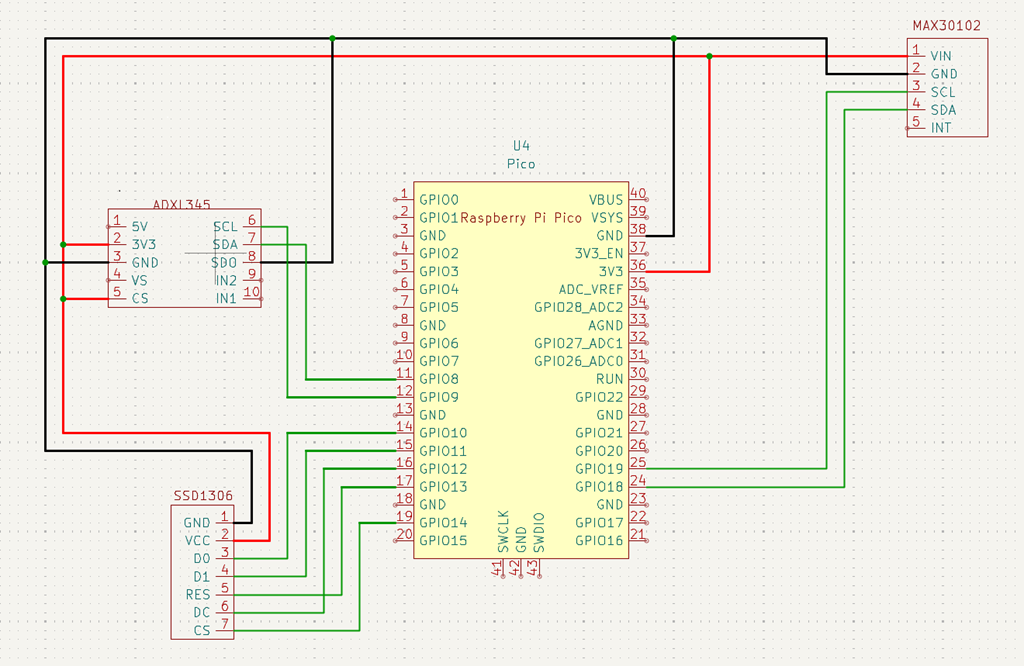
Schematic Diagram

Components Overview
- 2x Raspberry Pi Pico 2W:
- one used as a debugger
- one used to control the sensors and display
- ADXL345 Accelerometer: used to measure step count through 3-axis acceleration data
- MAX30102: used to measure heart rate and blood oxygen level by detecting changes in light absorption from red and IR LEDs using a photoplethysmography sensor
- SSD1306: used to display real-time sensor data like the heart rate, SpO₂, and step count on an OLED screen
Log
Week 21 - 27 Apr
After my project got approved, I looked for the necessary hardware and software parts. After deciding on the parts, I ordered them.
Week 28 - 4 May
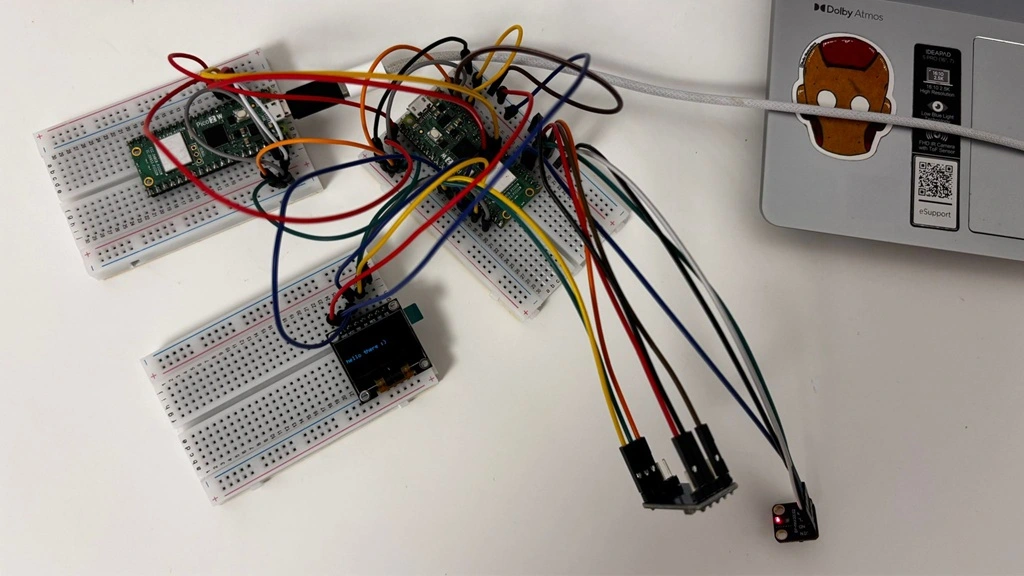
I started to assemble the parts on the breadboards in order to test each component. I managed to read the data on all three axis of the accelerometer, to determine the heart rate and SpO₂ from the pulse oximeter and print the information in the terminal. Additionally, I tested the screen.
Week 5 - 11 May
Week 12 - 18 May
Week 19 - 25 May
Hardware
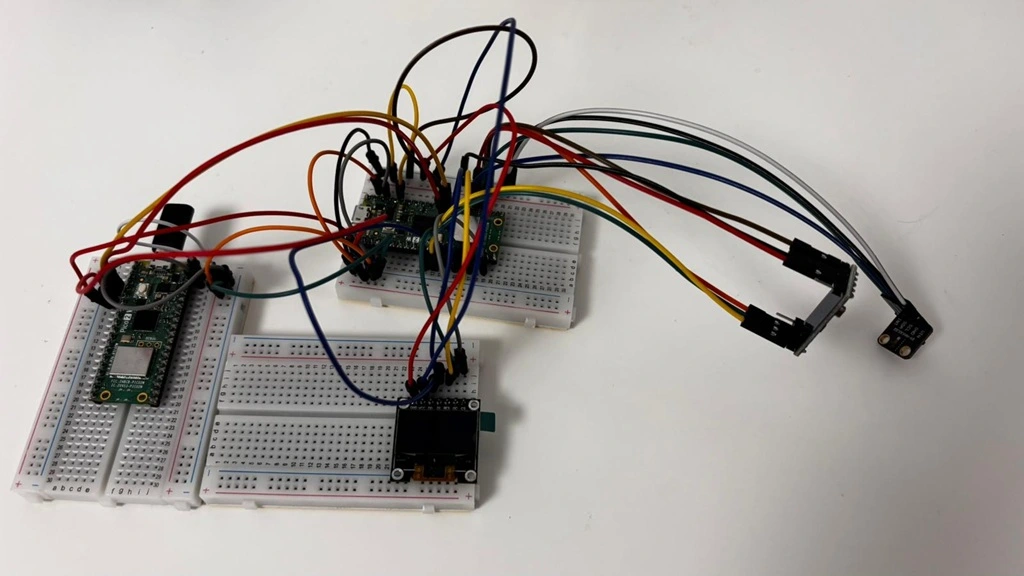
My project is built around the Raspberry Pi Pico 2W microcontroller, which collects and processes data from two sensors. An ADXL345 accelerometer is used to detect motion and count steps by measuring the changes in acceleration, while the MAX30102 pulse oximeter sensor measures heart rate and blood oxygen levels by detecting changes in light absorption due to blood flow. The SSD1306 OLED display shows in real-time the health metrics of the user. As of now, this is how the hardware looks like, but in the following weeks I will design a 3D case in order to make the device wearable.
Schematics
Bill of Materials
| Device | Usage | Price |
|---|---|---|
| 2x Raspberry Pi Pico 2W | The microcontroller and the debugger | 2 x 40 RON |
| ADXL345 | Accelerometer for detecting and counting steps | 13 RON |
| MAX30102 | Pulse oximeter and heart rate sensor | 13 RON |
| SSD1306 | OLED screen for displaying data | 24 RON |
| 3x Breadboards & Wires | Wiring | 3 x 5 RON + 8 RON |
Software
| Library | Description | Usage |
|---|---|---|
| embassy-executor | Asynchronous task executor | Used for task scheduling |
| embassy-rp | RP2040 HAL for Embassy | Access to RP2040 peripherals (GPIO, SPI, I2C) |
| embassy-time | Timing utilities | Used for delays |
| embassy-sync | Async synchronization primitives | Used for Mutex |
| embedded-graphics | 2D graphics library | Rendering text on the screen |
| ssd1306 | OLED display driver | Used to control the display |
| display-interface-spi | SPI display abstraction | Facilitates SPI communication between SSD1306 and device |
| defmt | Lightweight logging crate | Used for logging data |
| heapless | Data structures | Used for creating strings |