WAV-player & more
WAV-player with adjustable volume, LED and wireless light.
Author: Gabriel Dănăilă
GitHub Project Link: https://github.com/UPB-FILS-MA/project-Gabi10017
Description
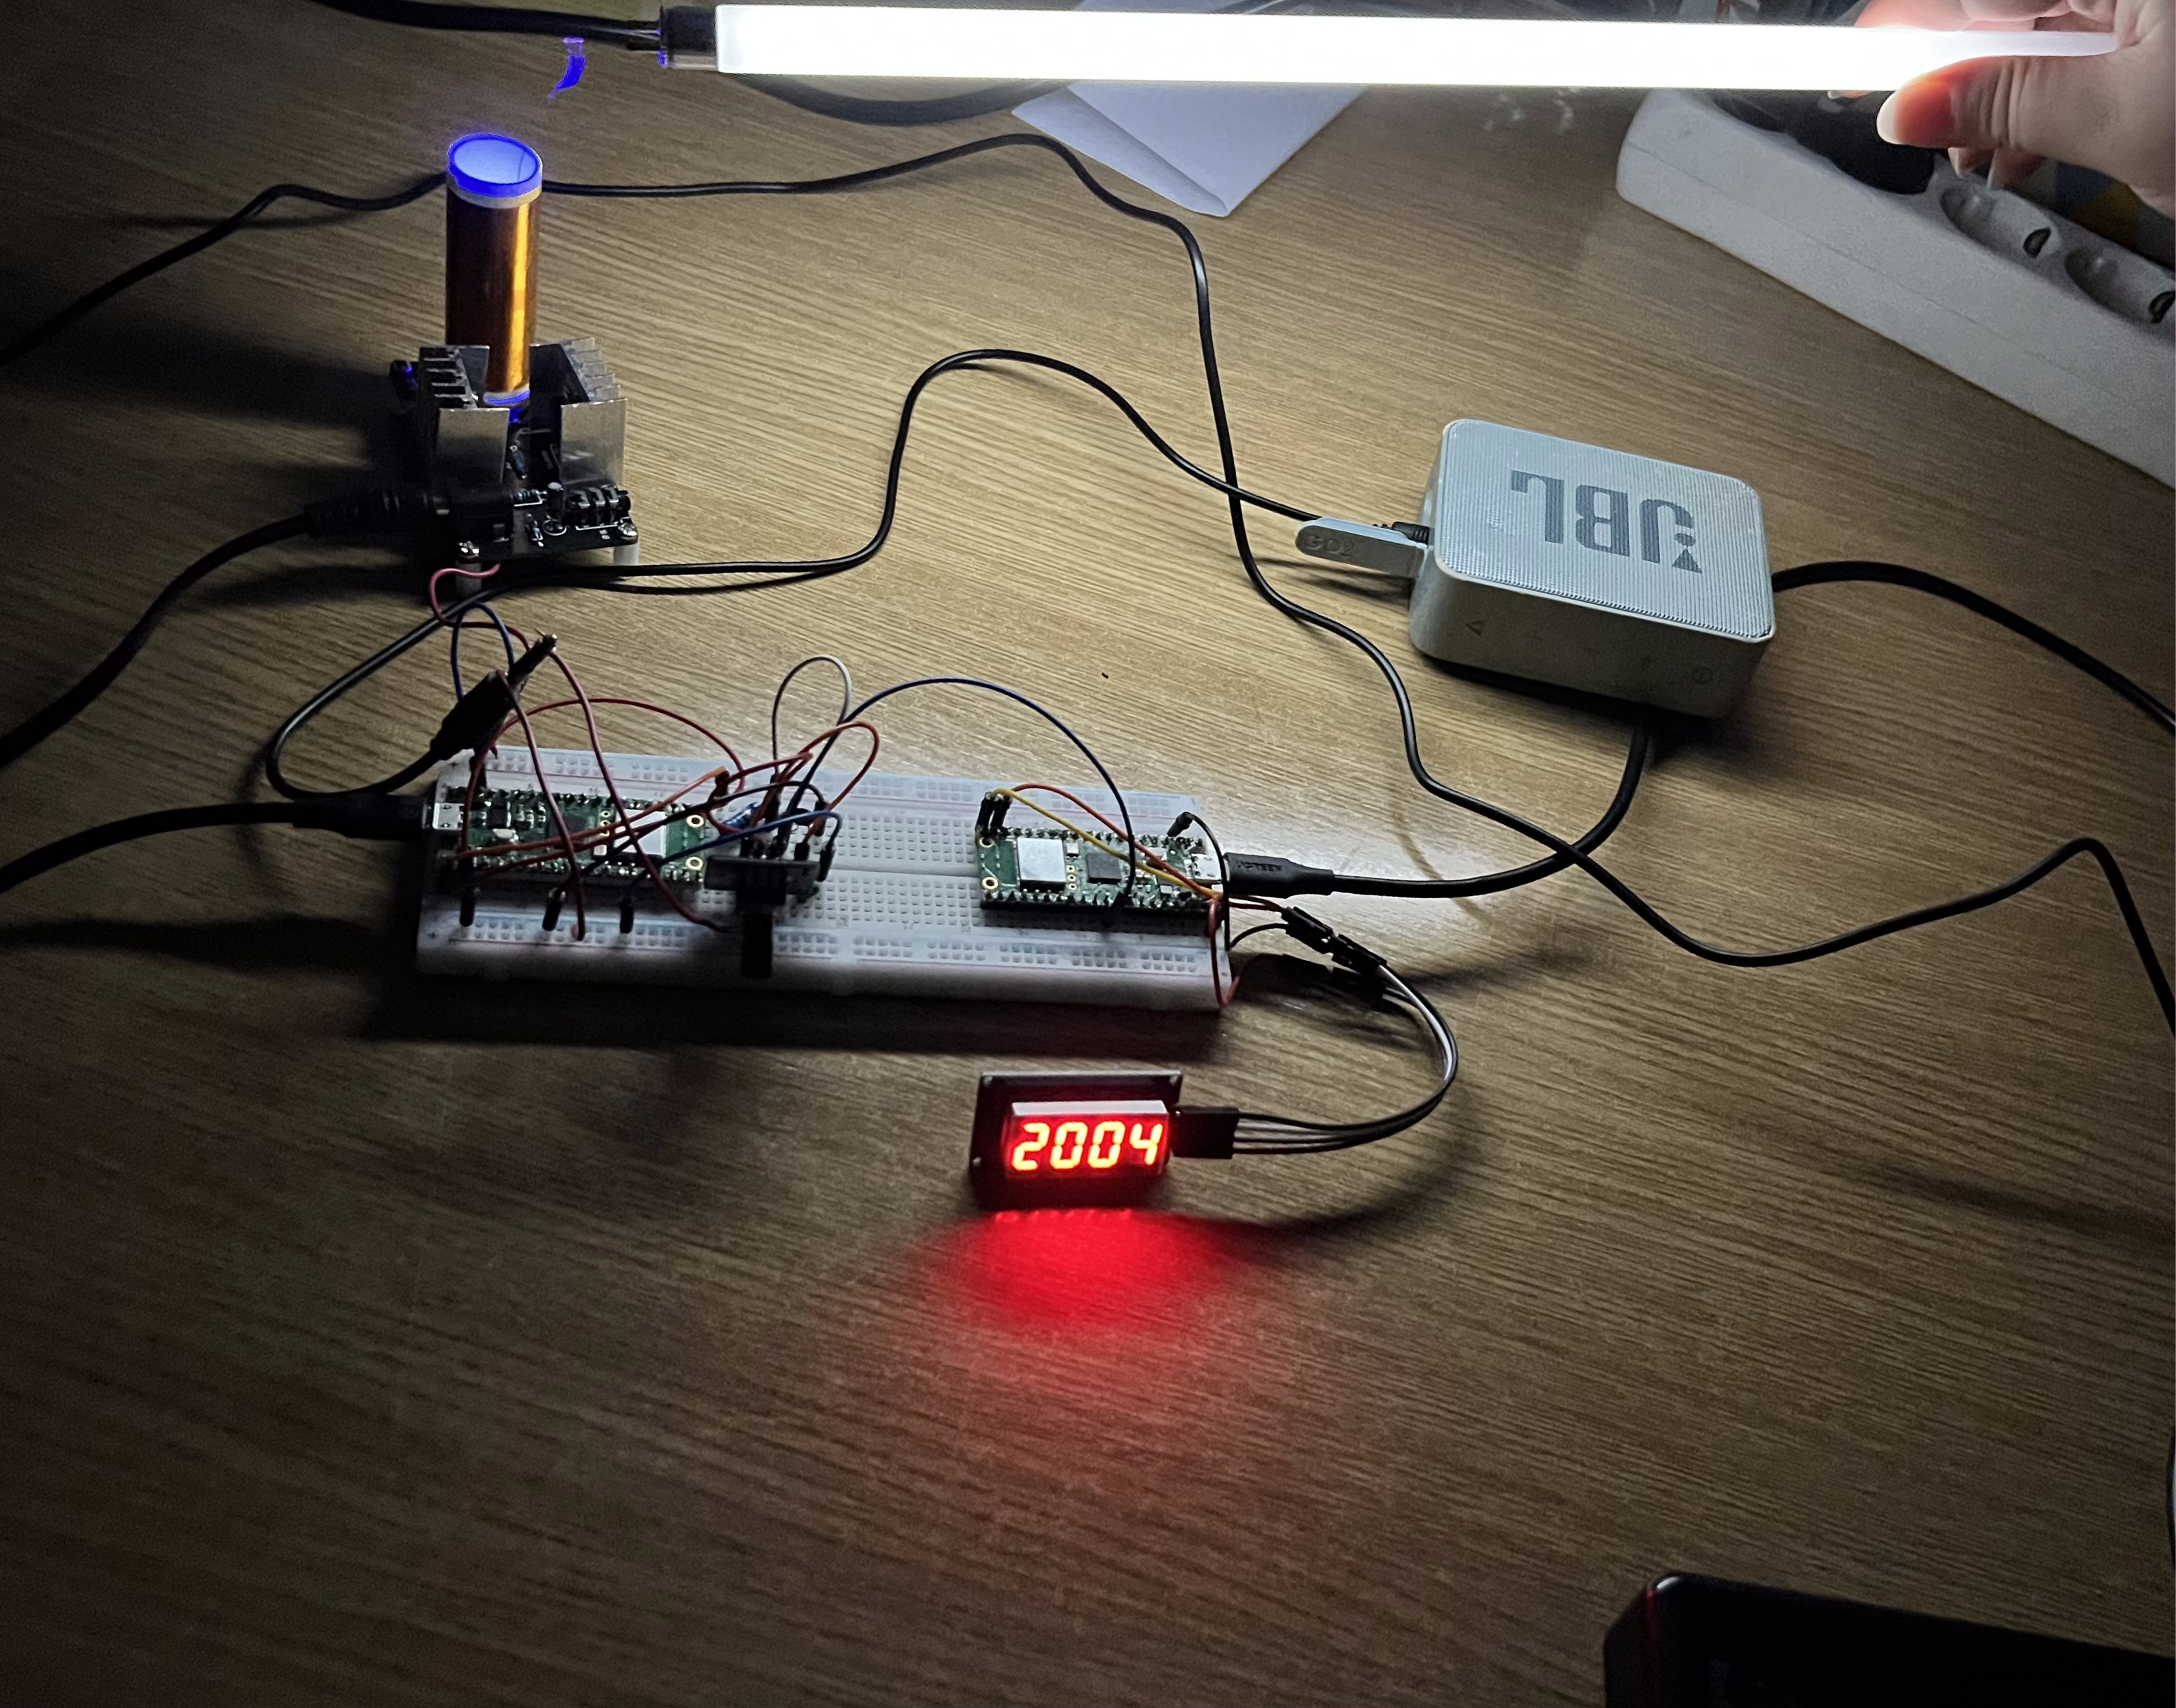
The first microcontroller plays an WAV-coded audio file, modulating it in function of frequency over PWM, which is filtered by an RC Filter and then sent over a 3.5mm Jack to a JBL Speaker, which plays the analog audio. The audio volume is controlled by a potentiometer, not from the speaker. The potentiometer's value is read by another identical microcontroller over ADC, and then it is processed. The result (in ohms) is displayed on a 4-digit display. The Tesla coil can also be used to play audio, but it is not powerful enough for this task, so I decided to bring a fluorescent neon light and use the coil for powering the tube.
Motivation
I chose this project because I think it is an interesting, innovative idea to put in practice, that is neither too easy or too complex to do for a single-person project. This project idea was brought to me by the lab teacher.
Architecture
The project has the following architecture:
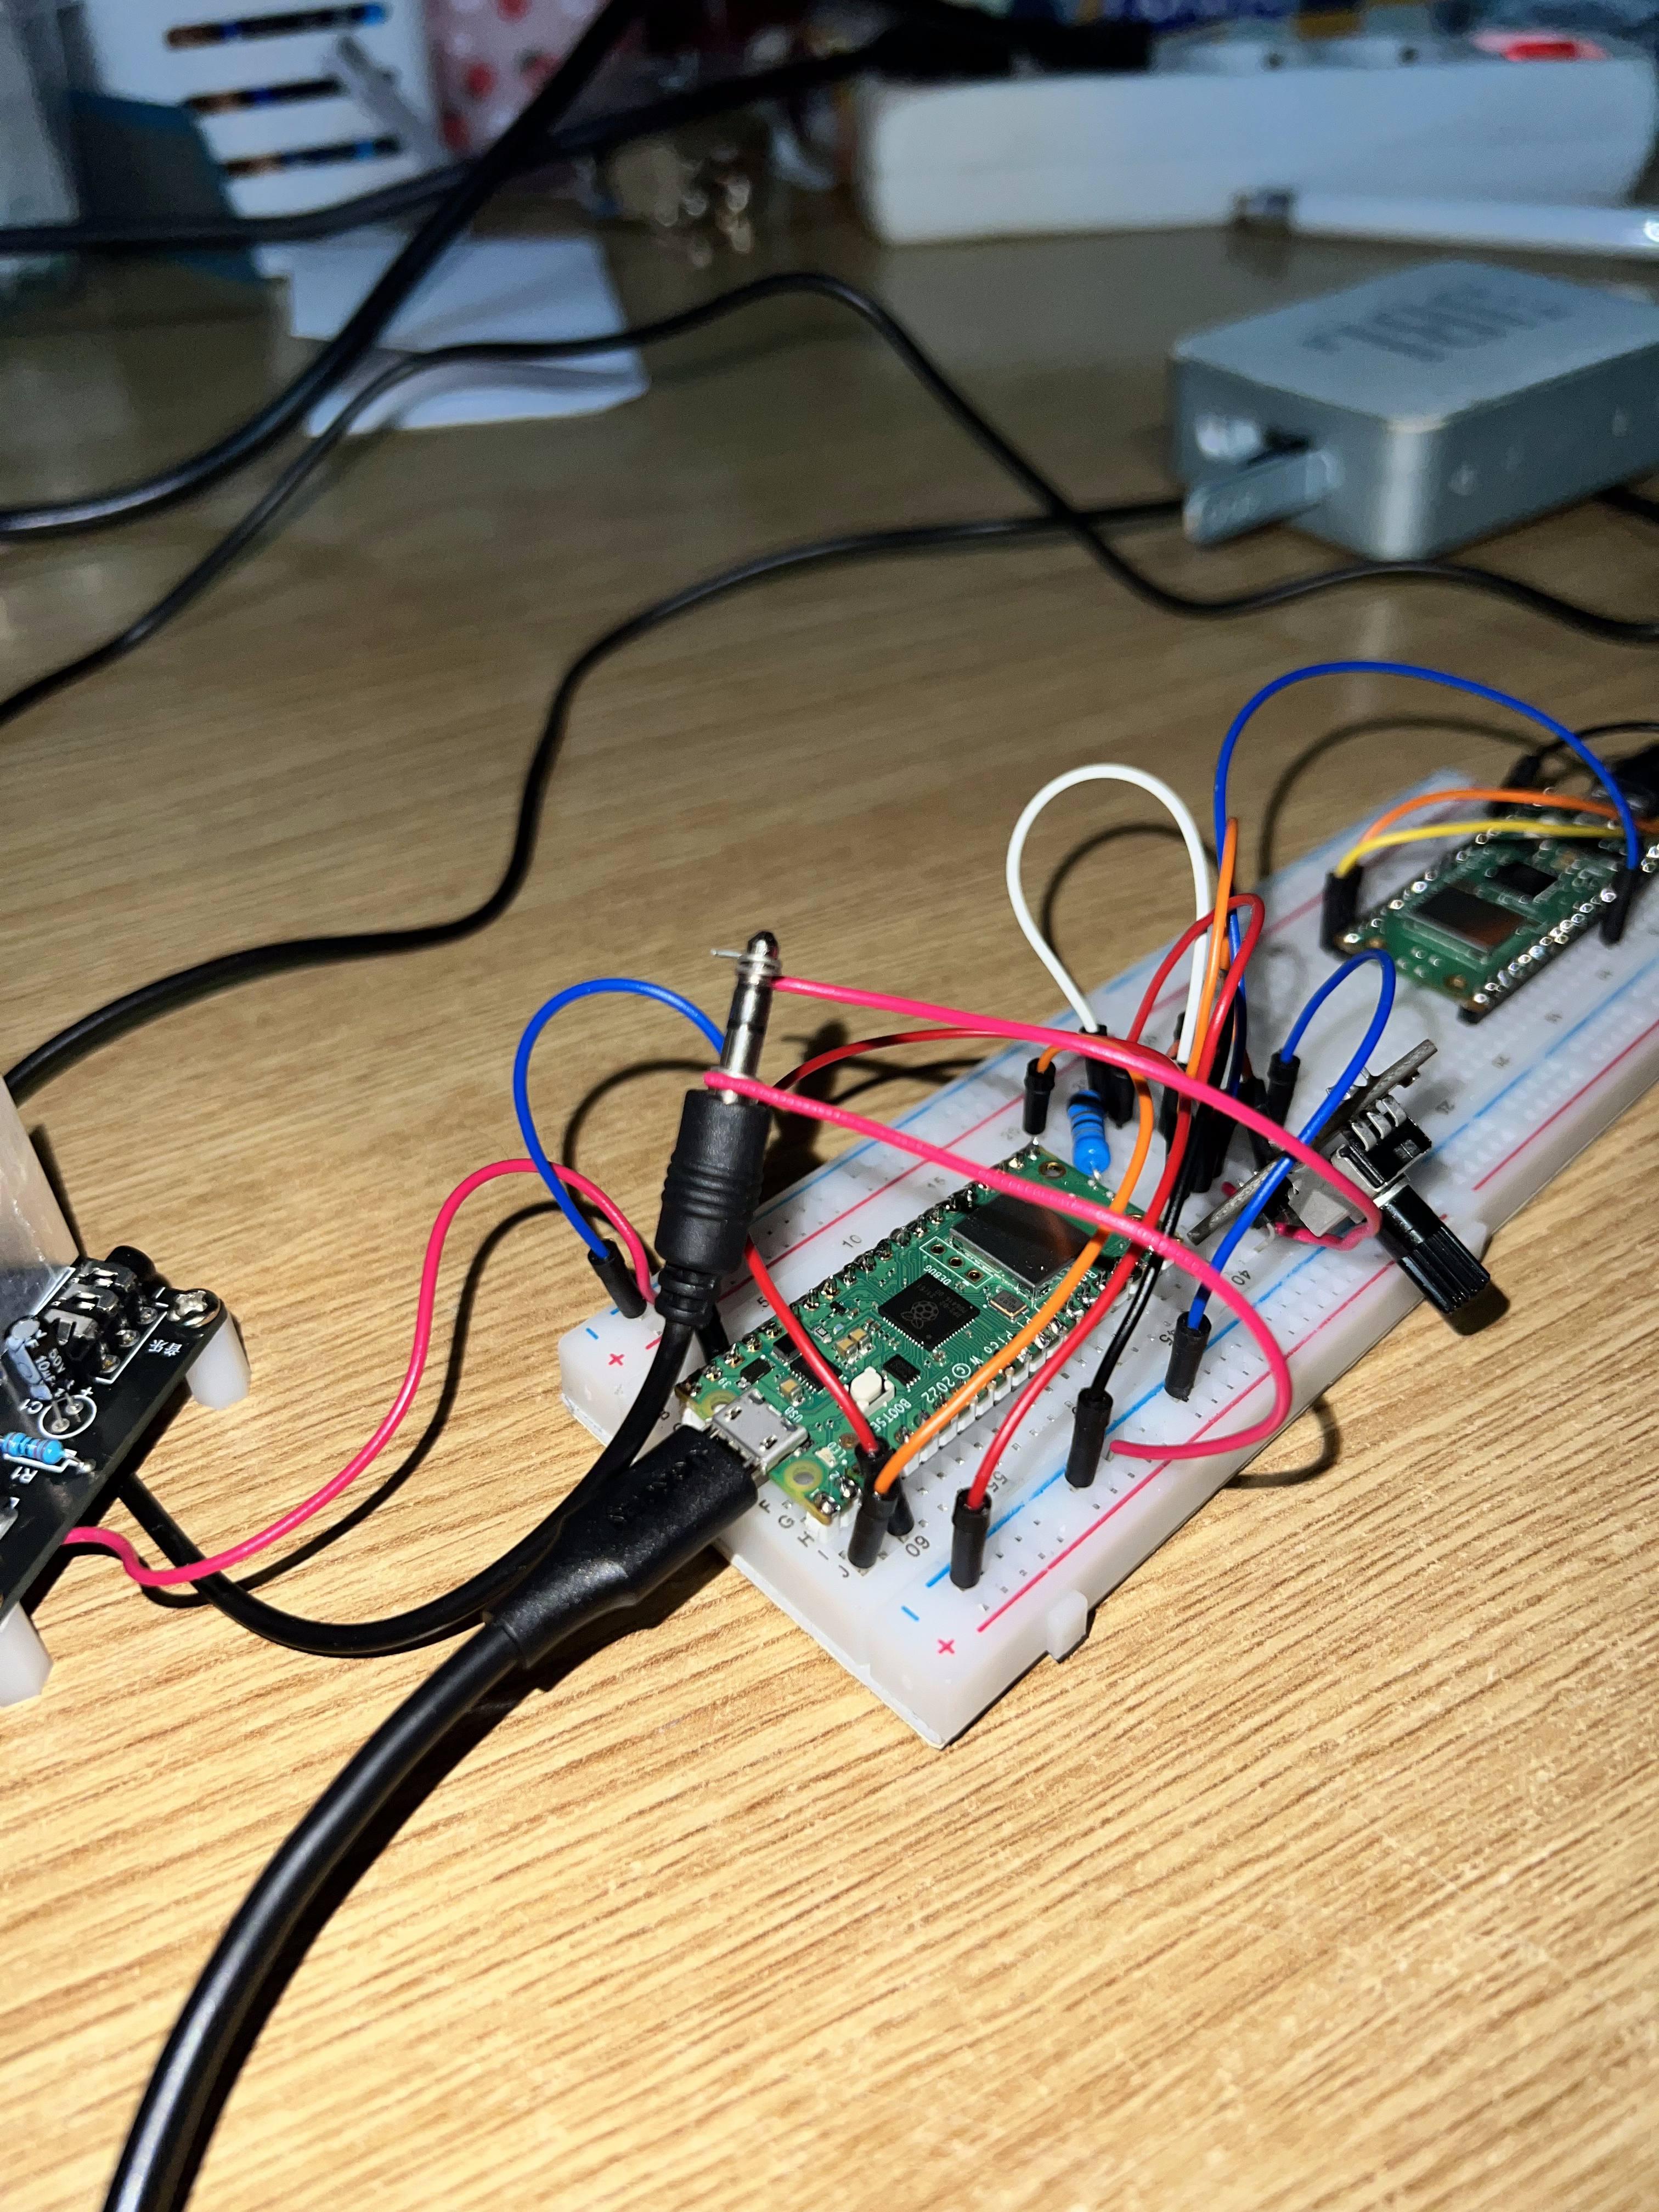
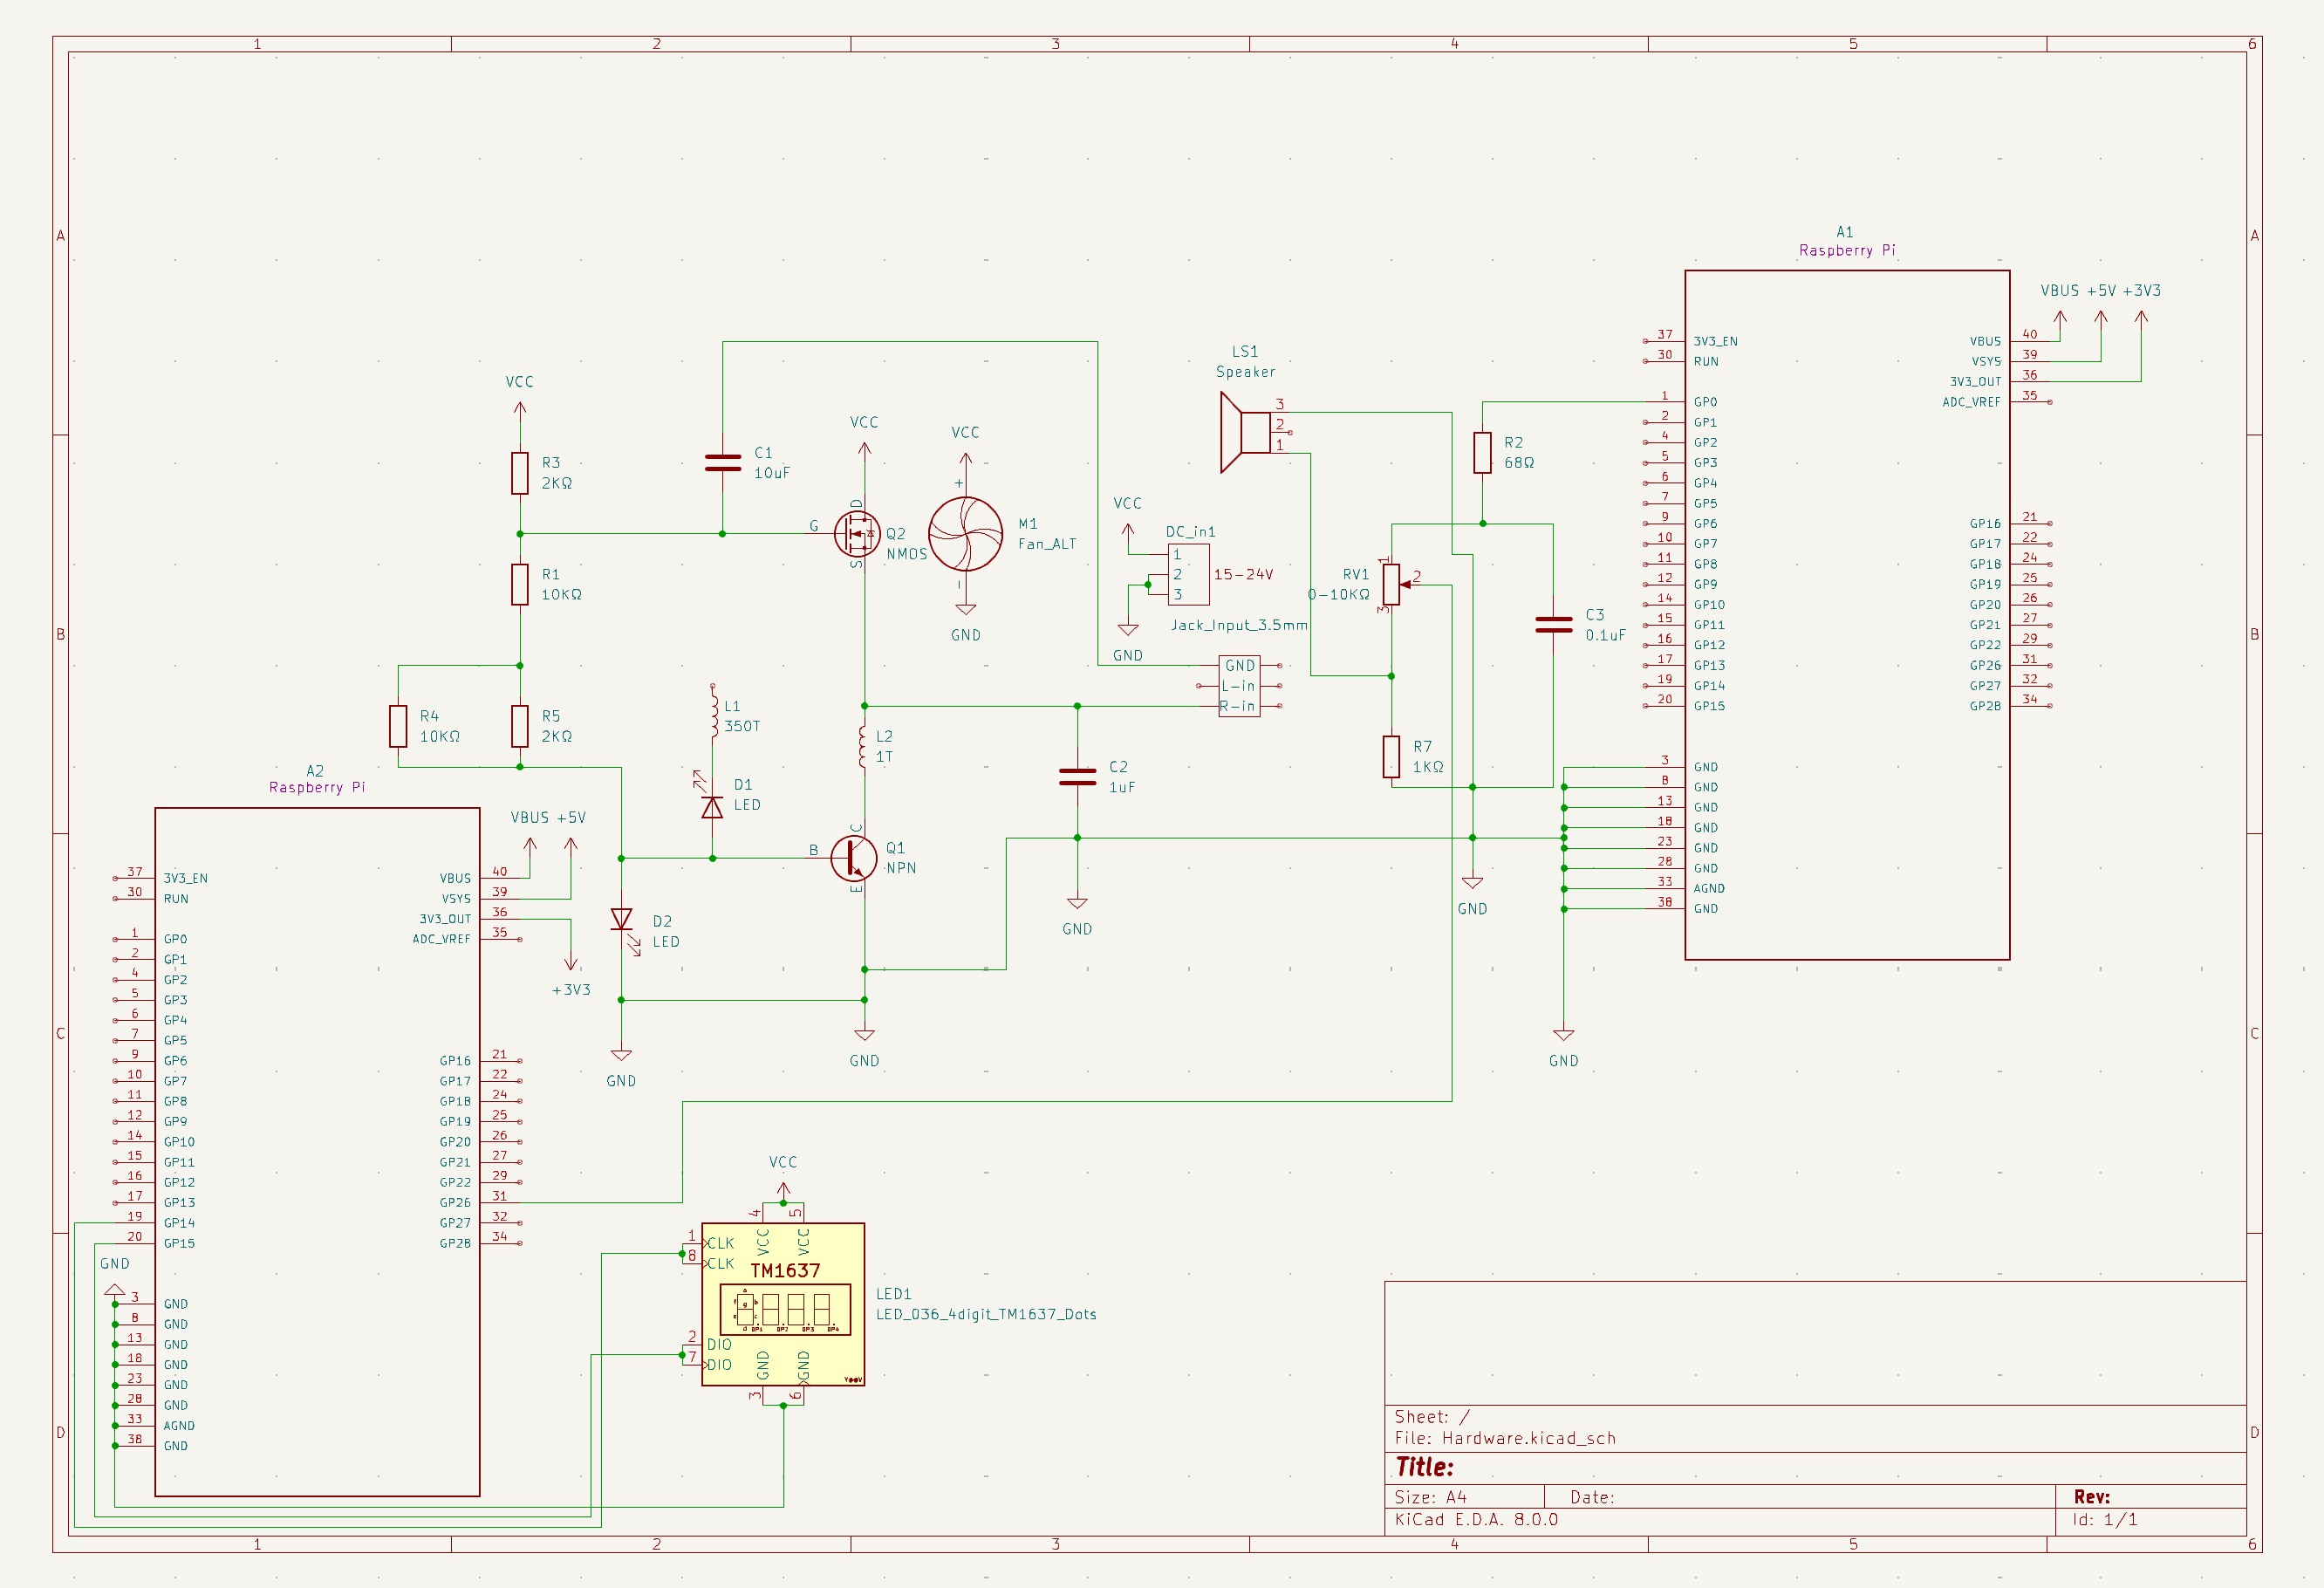
- Raspberry Pi Pico 1: The first Pico has the role of processing the digital audio to a pulse-width modulated analog signal, transmitting it over a GPIO pin.
- RC Filter: The RC Filter is a simple circuit, formed out of a few resistors and capacitors, which filters out some of the noise out of the PWM signal. The output signal is clearer.
- Potentiometer: The potentiometer is used to adjust the volume of the speaker.
- JBL Speaker: Is used to play the analog signal.
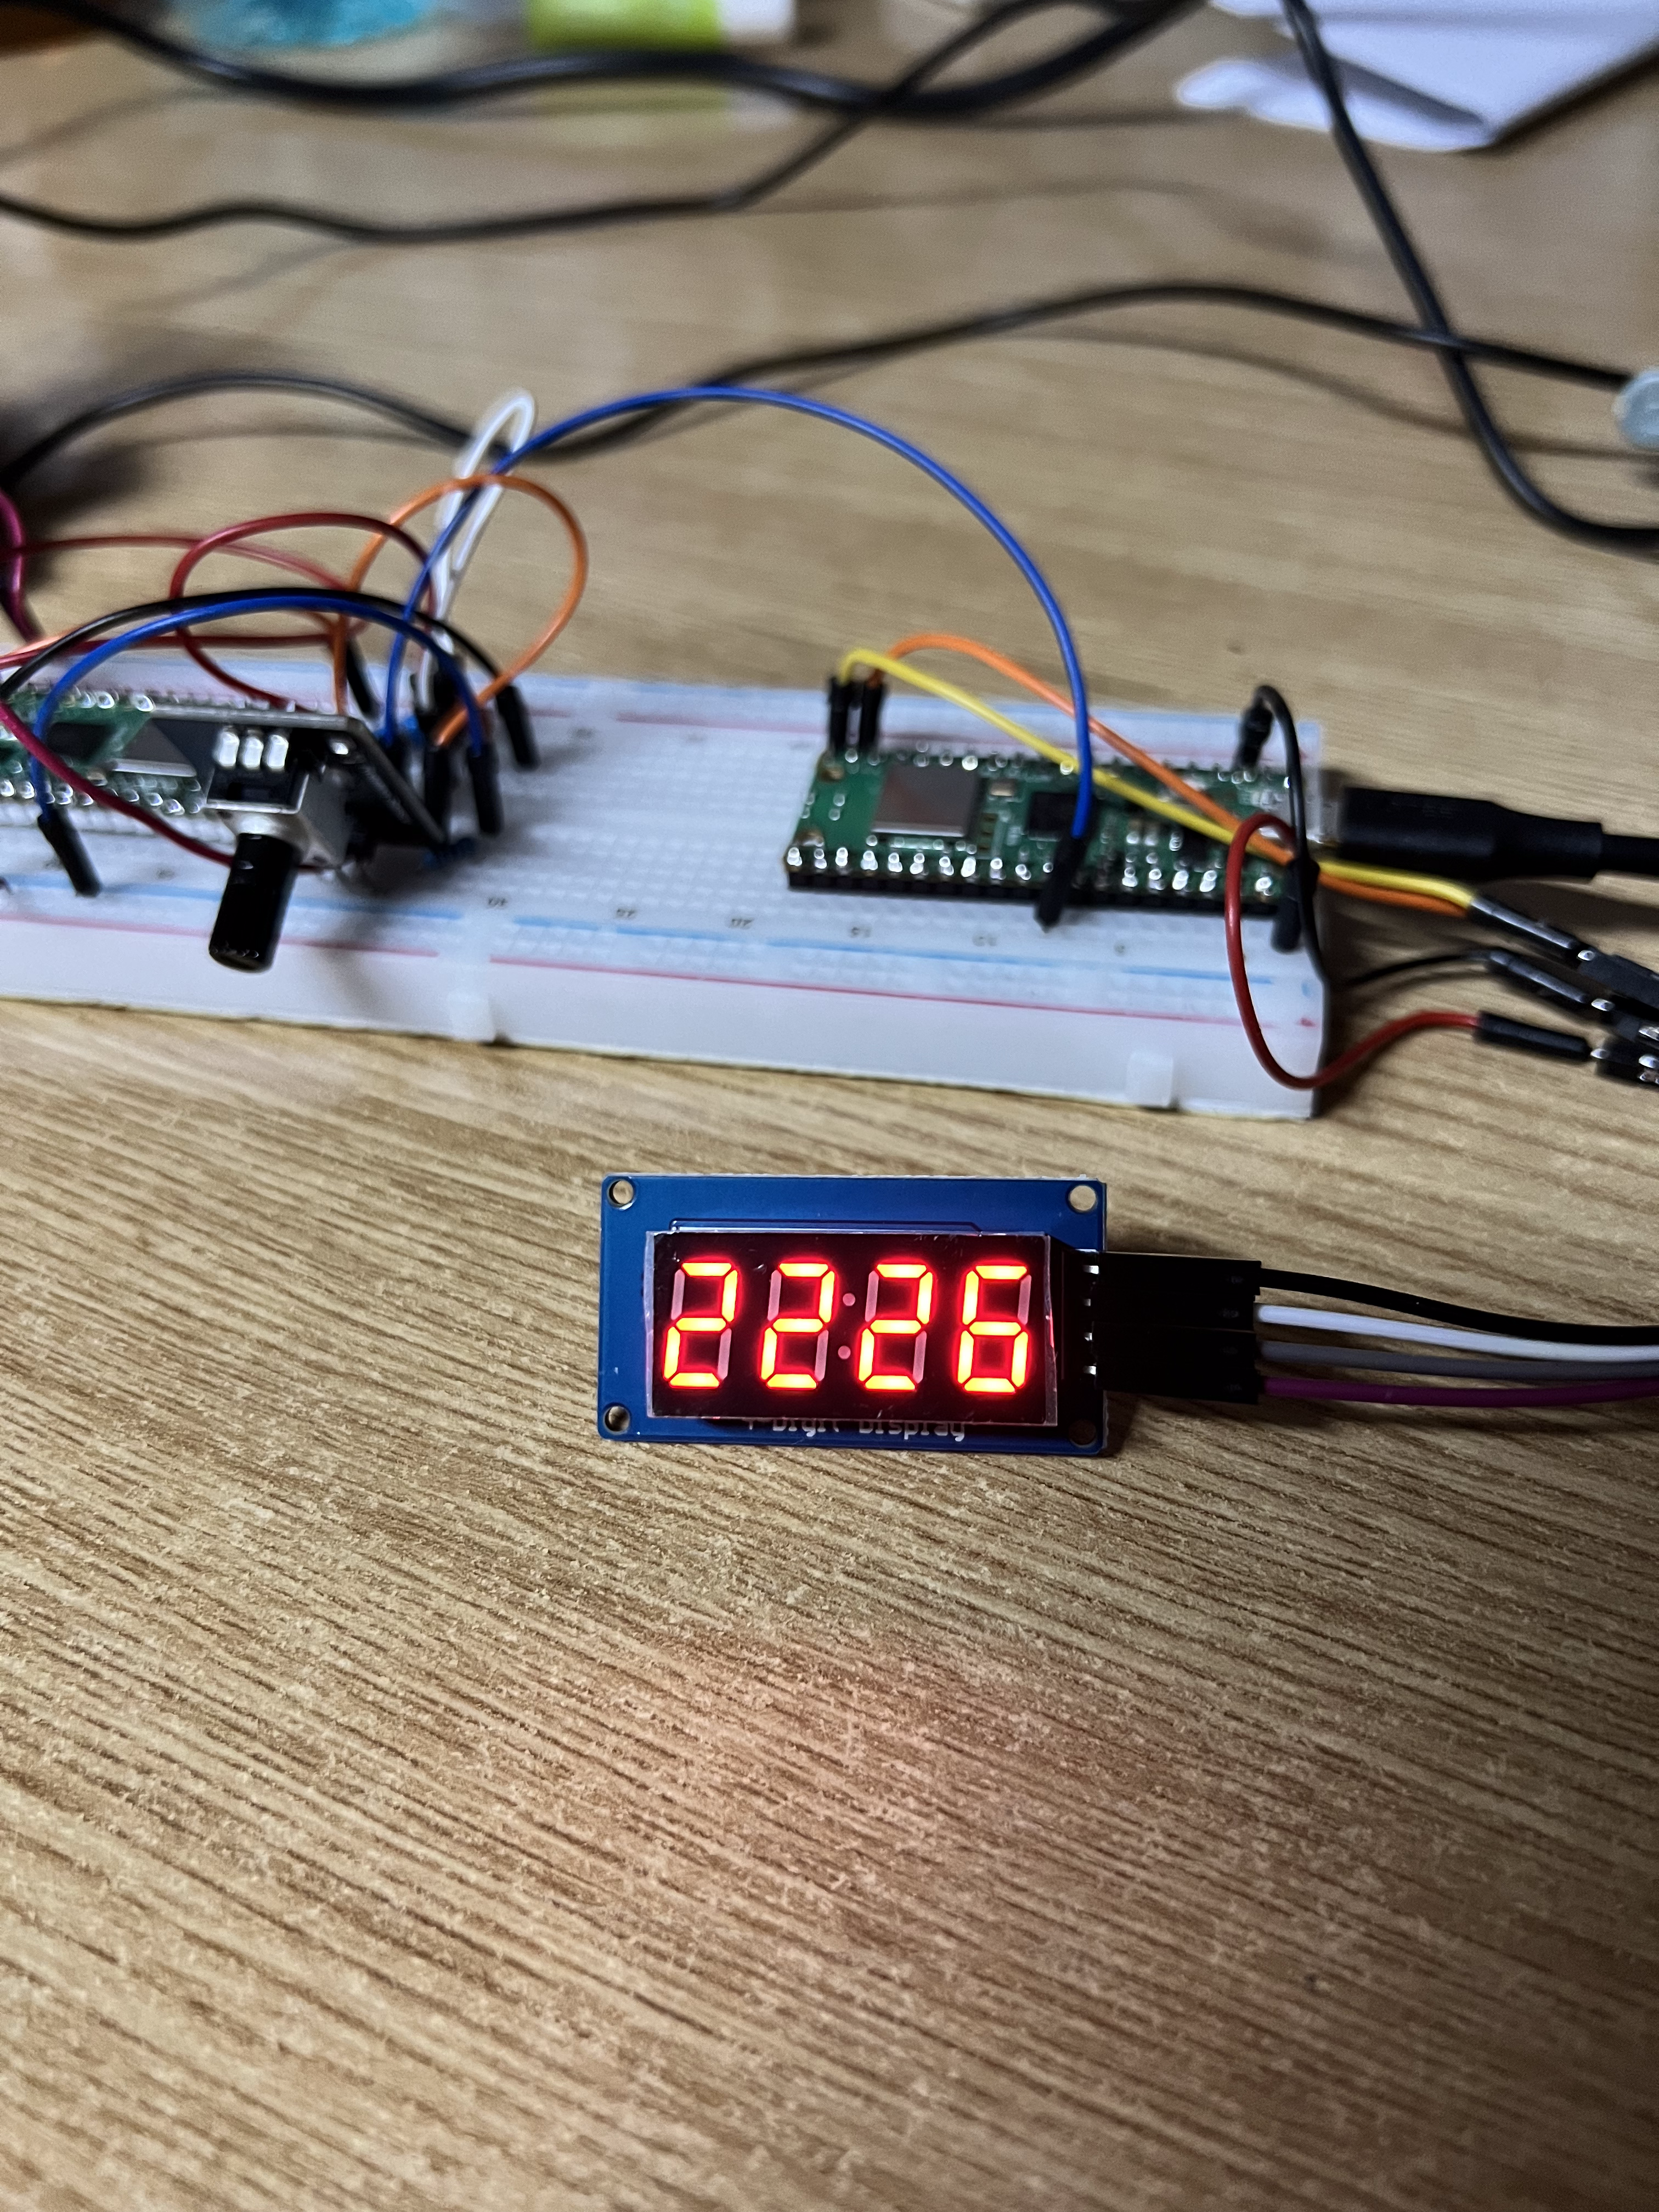
- Raspberry Pi Pico 2: The second Pico has the role of reading and processing the potentiometer's resistance. The processed data is then transmitted to the 4 digits display.
- 4 digits Display: Is used to display the potentiometer's resistance.
- Powerbank/Power Source: Is used to power the devices.
- Cooling Fan: Is used to cool off the transistors used to power the Tesla coil.
- Fluorescent Neon Tube: Turns electrical current into visible light.
- PCB with Tesla Coil Soldered onto it: The PCB is used to generate an EMF used for powering up the fluorescent tube.


Log
Week 6 - 12 May
Received first hardware parts. The Tesla Coil did not work so I ordered another one. First succesful tests with the PWM Audio code.
Week 7 - 19 May
Received the second Tesla Coil, which, after some fixes from the lab teacher, started working but had a very low visual and acustical intensity. Decided to order other components and shift the project's focus a bit. After an intensive code testing session I decided to use two Pico microcontrollers for two separate purposes. The microcontrollers will both be placed on the same breadboard.
Week 20 - 26 May
This week I finally received and assembled the last pieces of hardware. I have also realized that the potentiometer used had to be a logarithmic one, not linear. I also replaced the default beep.wav file with a longer audio file. I have replaced the hardware pictures, with newer, up to date, pictures. Updated the software library. Added an explanation for as why I have used 2 Raspberry Pi Pico.
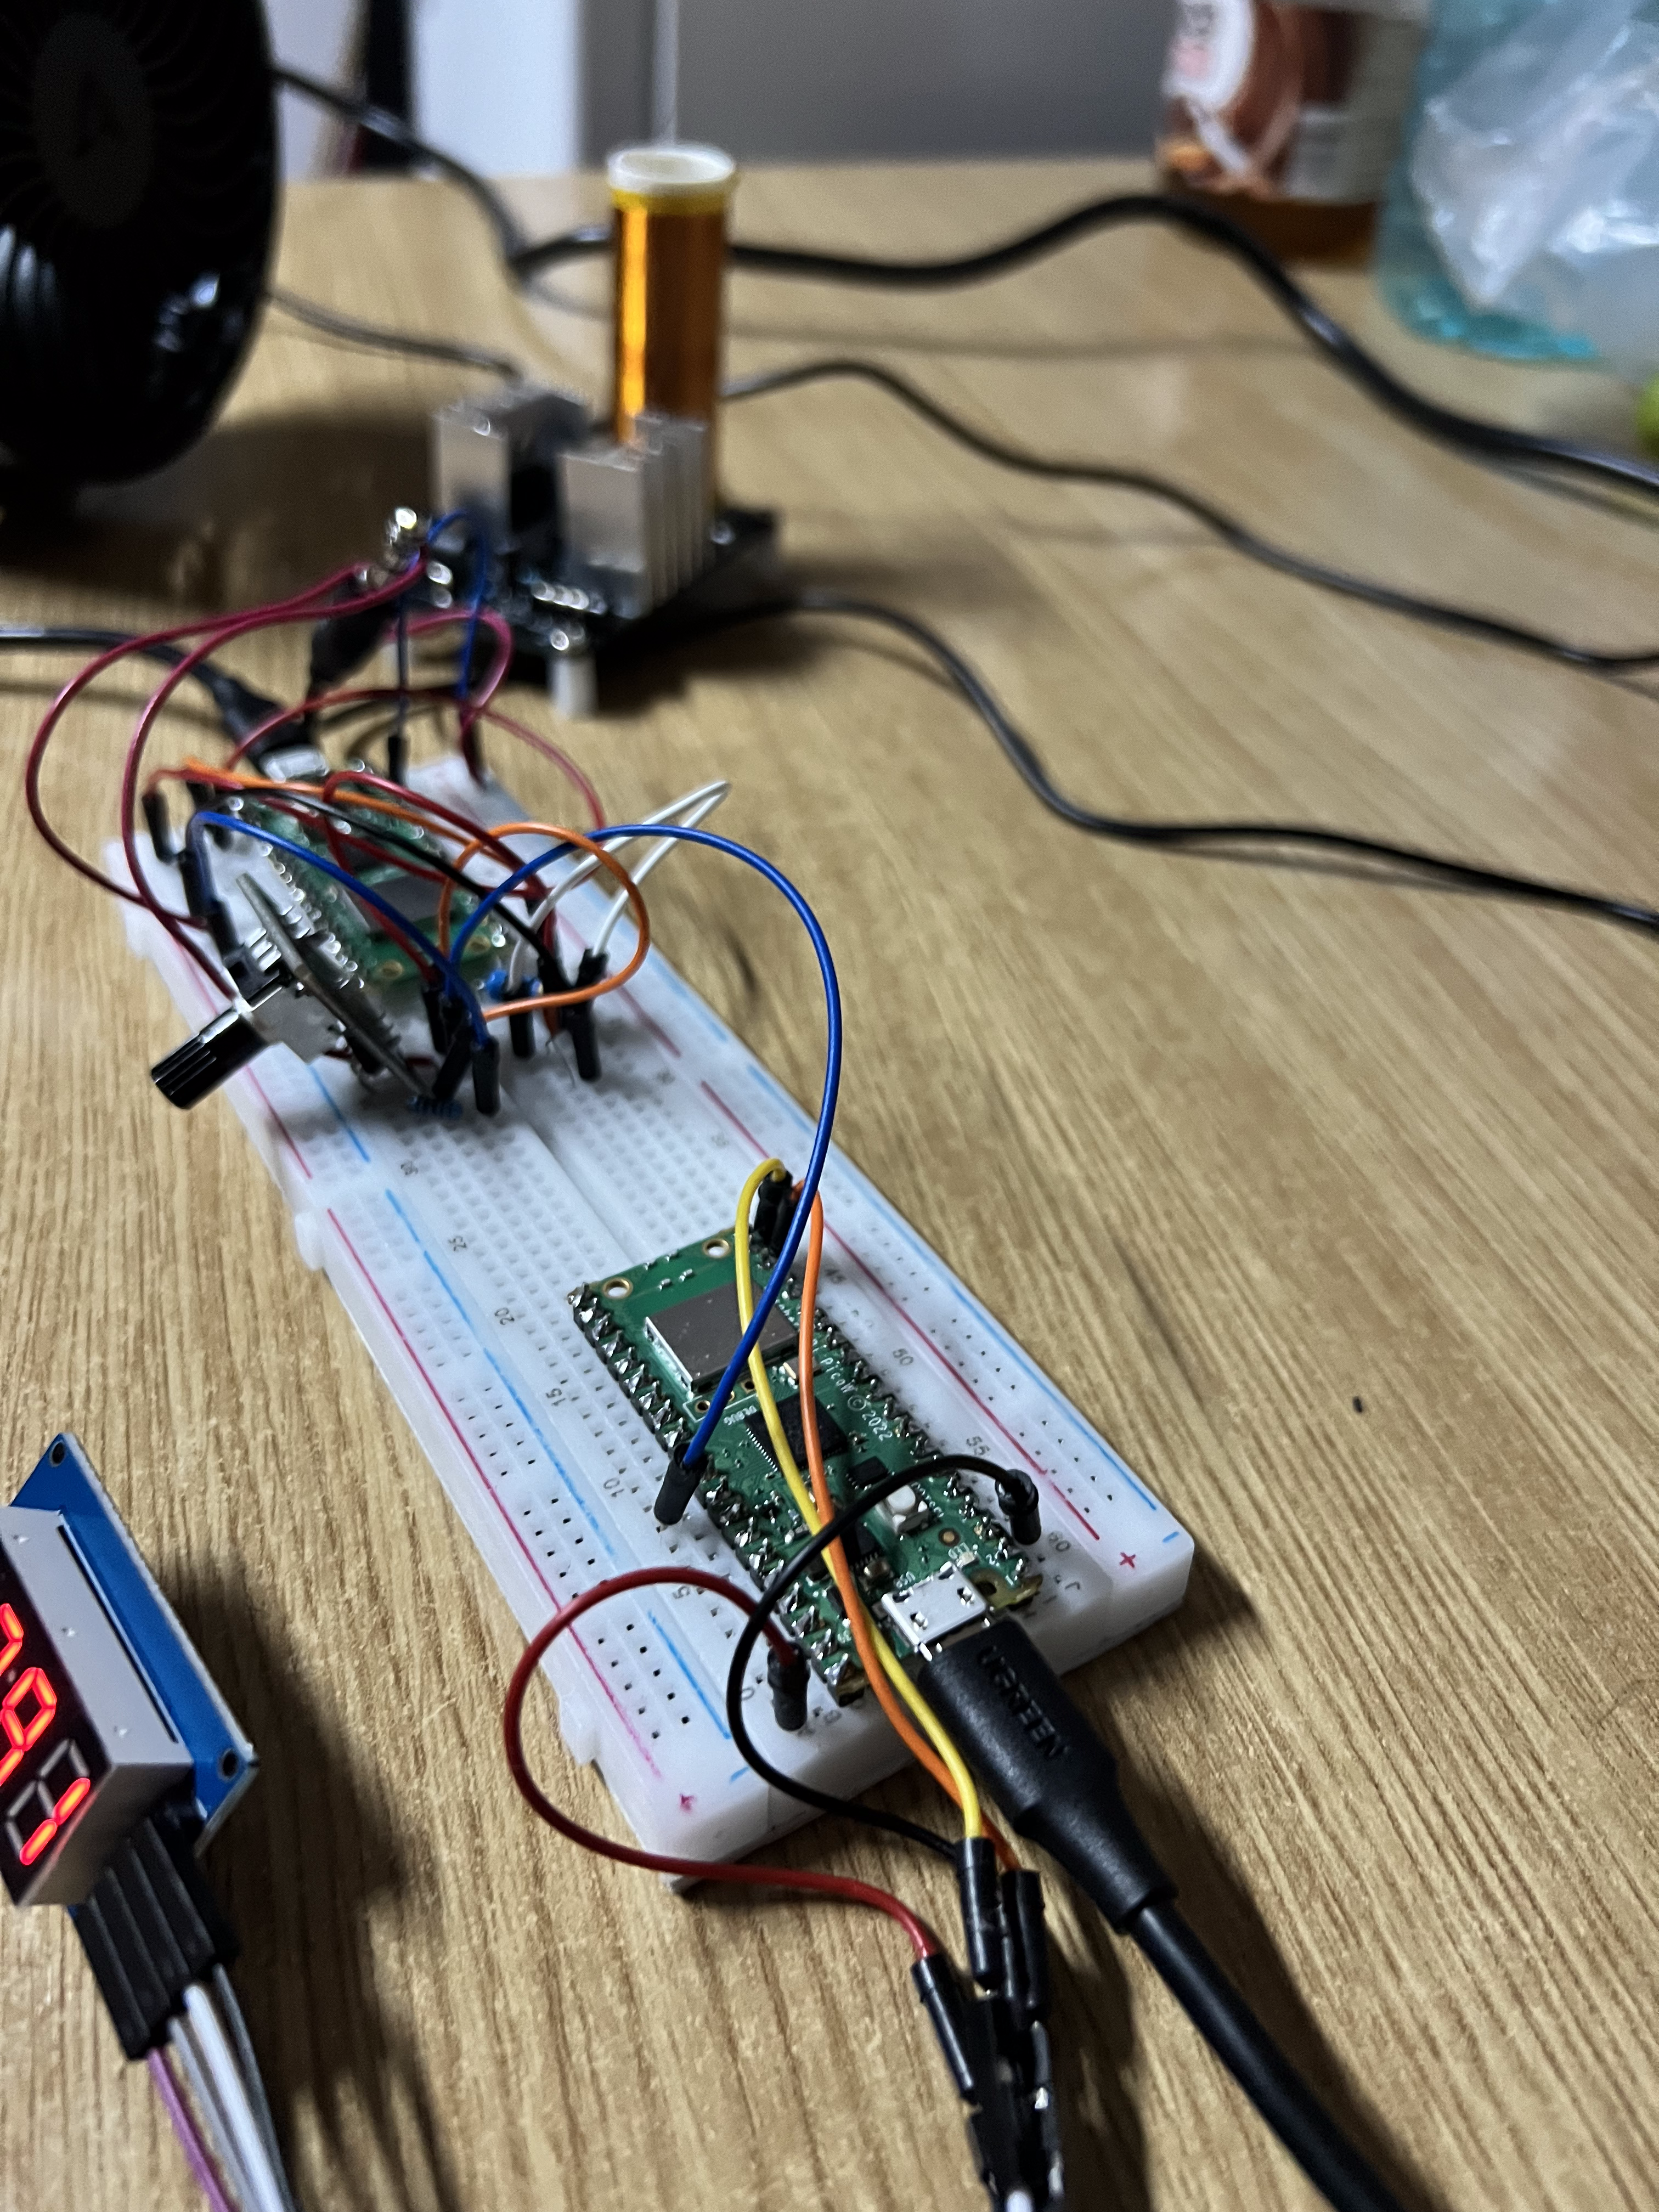
Hardware
I am using a Pico MCU in order to decode and send audio to a speaker, a potentiometer for adjustable volume, a secondary Pico MCU in order to process and send potentiometer's resistance value to a 4 digit display. Also, I will display a Tesla Coil which powers on a fluorescent neon tube wirelessly.
I am using two Pico MCUs because the code snippets and code parts that I use are made for either embassy-rp or embedded-hal specifically. This, on its own it is not the problem. The issue is that embassy-rp, at its core, is actually based on embedded-hal, both using one or more of the same packages. The pieces of code can be put together as one, without issues from rust-analyzer, but with issues from the compiler, which can't compile the same package twice. Theoretically, if all the code would be made to use only one HAL Implementation, it would work, but, the PWM audio, being written in bare metal, using unsafe methods, would be hard to switch into embassy-rp. On the other hand, switching the LED part of the code (which is in embassy-rp) would be equally as hard, if we would want to keep the same functionalities. These being said, the most optimal way I found was to split the code based on the implementation used, with the PWM Audio being based on bare metal embedded-hal and the LED->ADC part being based on embassy-rp. As such, the Pico MCUs, each run its own HAL Implementation.
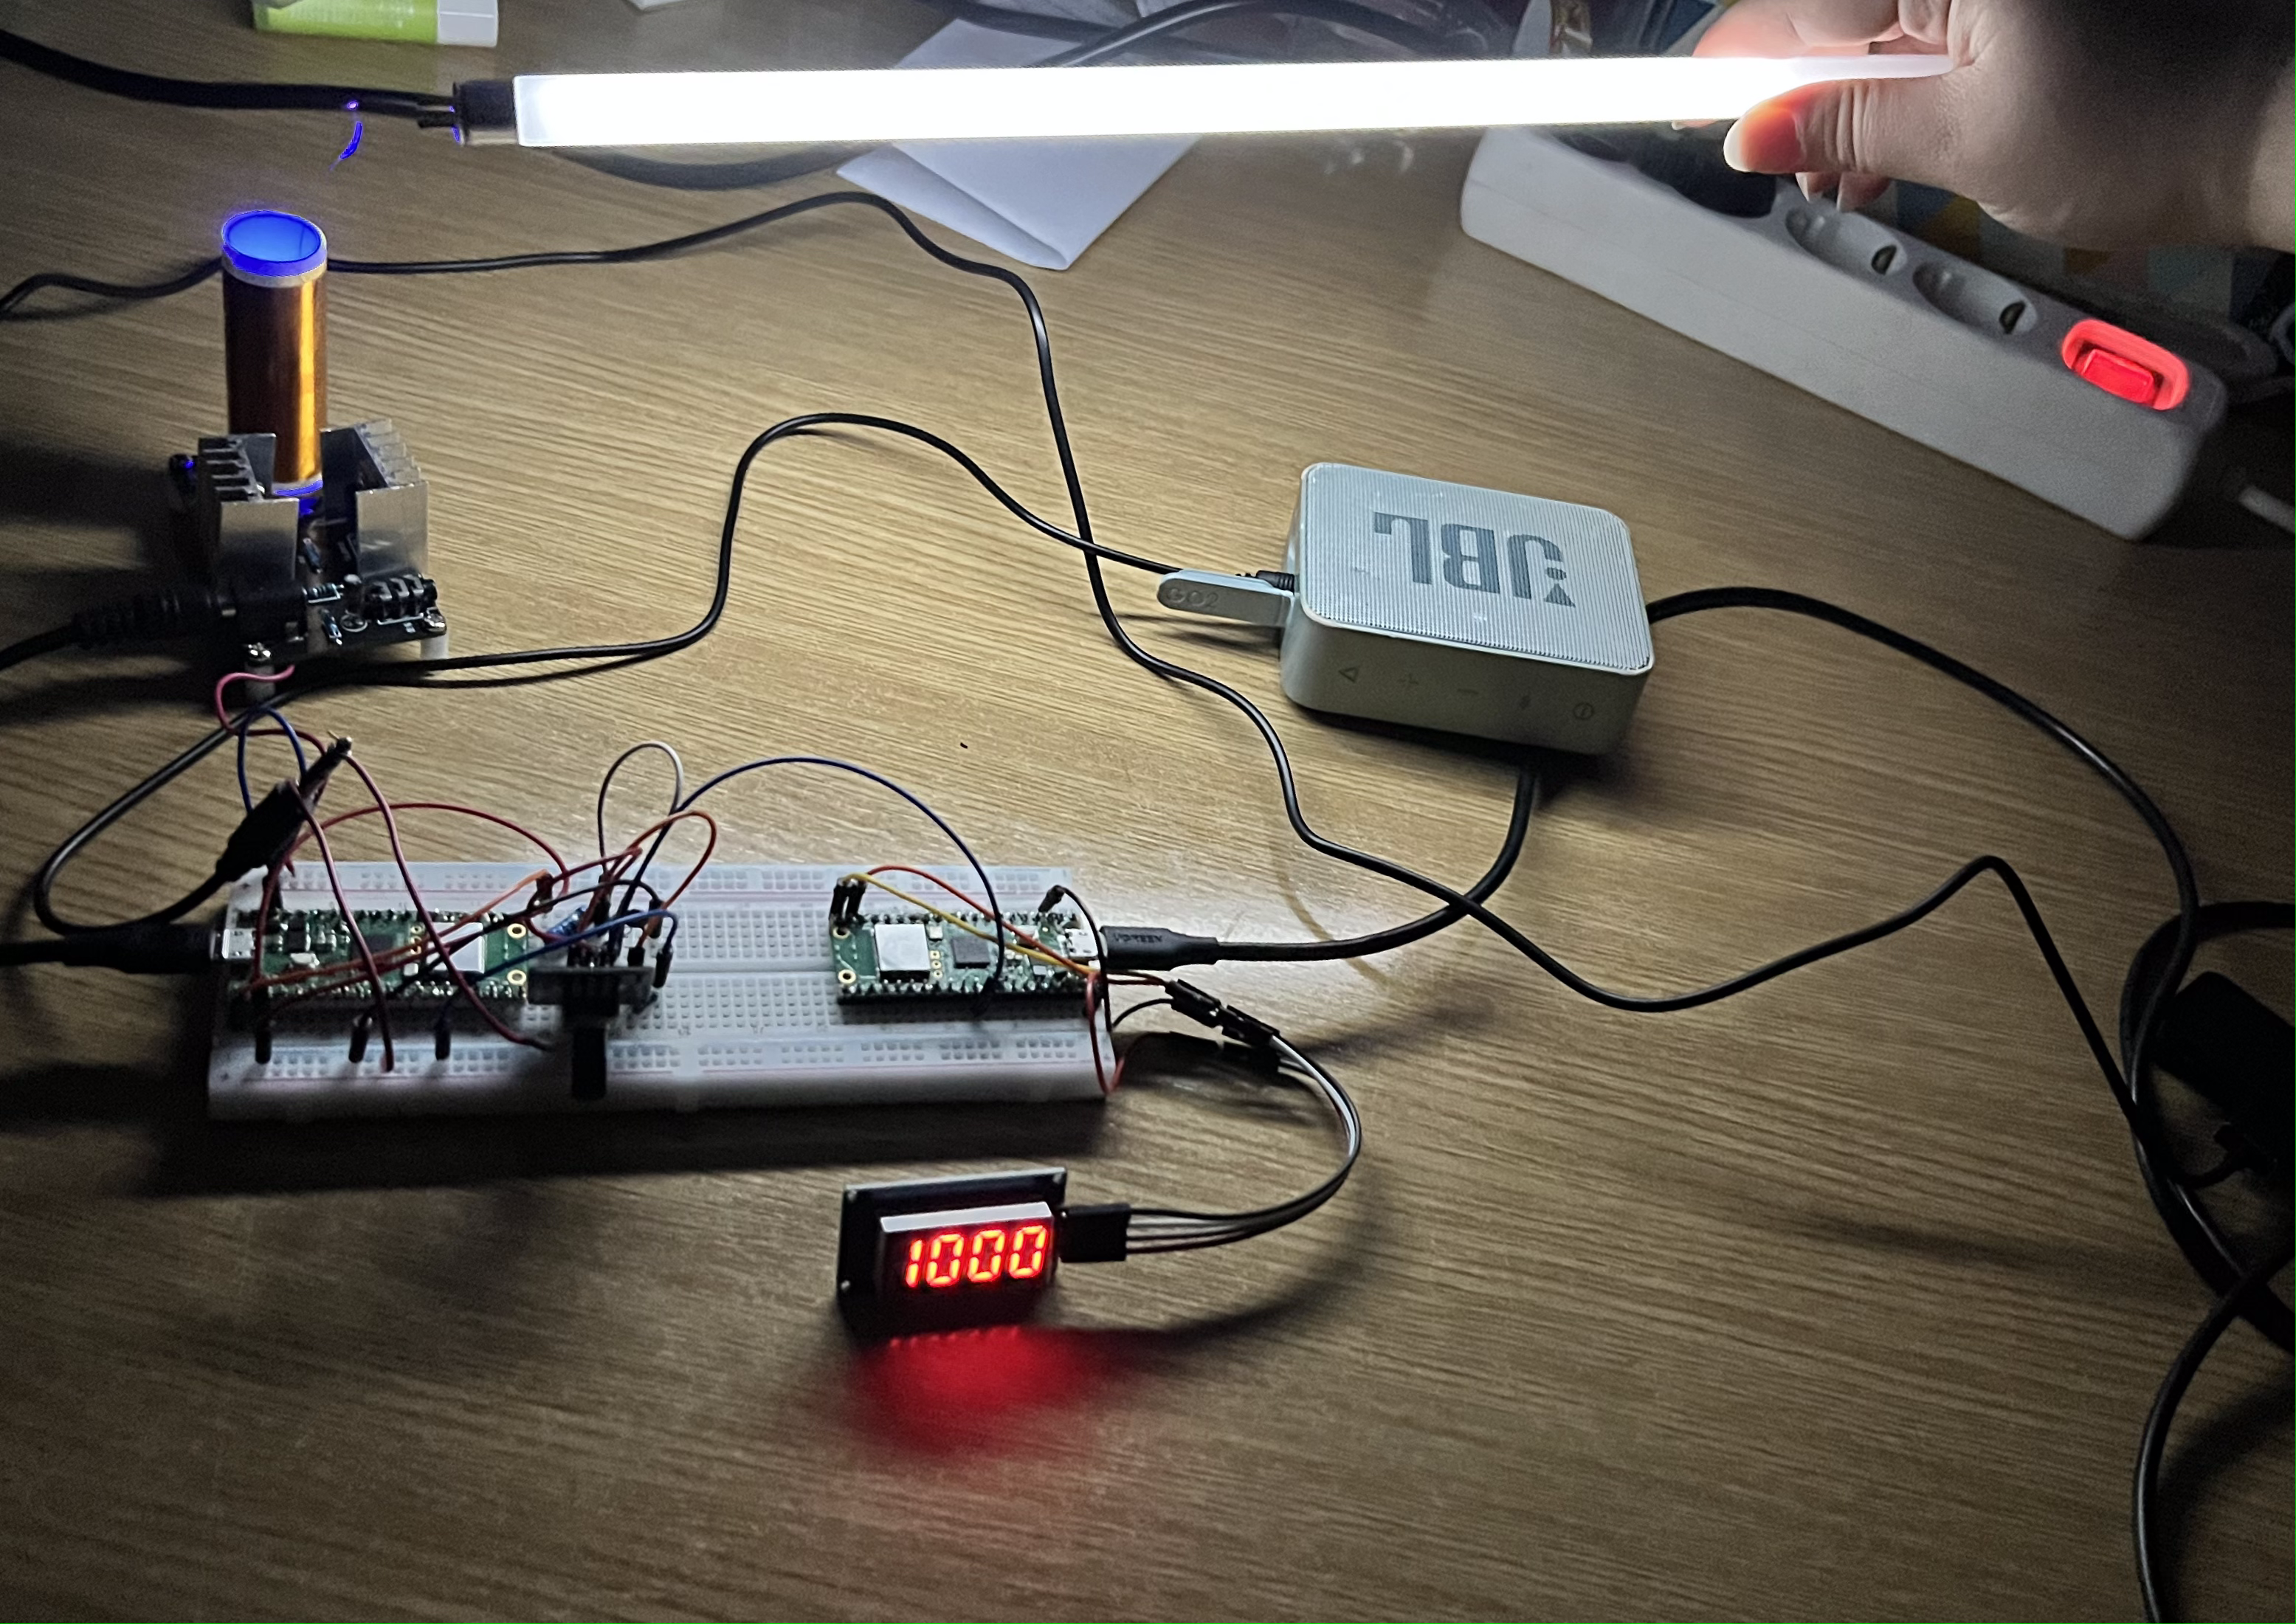
Pictures
|
|
|

|
|
|
Schematics
Bill of Materials
| Device | Usage | Price |
|---|---|---|
| 2x Rapspberry Pi Pico W | The microcontrollers | 70 RON |
| Kit DIY Mini Speaker Tesla Coil 15-24V | Speaker/EMF generator for powering nearby bulbs/neon tubs | 45 RON |
| 4 Digits LED Display | Displays the potentiometer's resistance | 12 RON |
| 2x Power and Data Cable | Micro-USB to USB-A cable | 16 RON |
| 2x Header Pins for Pi Pico W | Header Pins | 8 RON |
| Electronic Components Starting Kit | Kit with Electronic components | 100 RON |
| Breadboard with 830 points | Connects components | In-Kit |
| 2x Ceramic Capacitor 104 | Electrical component | In-Kit |
| Ceramic Capacitor 105 | Electrical component | In-Kit |
| Electrolytic Capacitor 10uF | Electrical component | In-Kit |
| 2x 10KΩ Resistors | Electrical component | In-Kit |
| 2x 2KΩ Resistors | Electrical component | In-Kit |
| 1KΩ Resistor | Part of the RC-Filter | In-Kit |
| 68Ω Resistor | Part of the RC-Filter | 5 RON |
| Potentiometer | Adapts speaker volume | 6 RON |
| USB Cooling Fan | Cools Transistors | 101 RON |
| USB Hub for the Powerbank | Splits an USB port in 4 more ports (used on the Powerbank) | 27 RON |
| USB-C to USB-A Adapter | Converts an USB-C port in an USB-A port (used on the Powerbank) | 13 RON |
| JBL Speaker | Plays Analog Audio | Already Owned |
| Power Source | Powers the Tesla Coil | 60 RON |
| Powerbank | Powers the Microcontrollers | Already Owned |
| Fluorescent Neon Tube | Lightens from the Tesla Coil | 6 RON |
Software
| Library | Description | Usage |
|---|---|---|
| embassy-rp | The embassy-rp HAL targets the Raspberry Pi RP2040 microcontroller. The HAL implements both blocking and async APIs for many peripherals. | Reading, processing and sending data over ADC to multiple peripherals |
| embassy-embedded-hal | Collection of utilities to use embedded-hal and embedded-storage traits with Embassy. | Dependency of embassy-rp used for adding embedded-hal/rp2040-hal traits to embassy |
| embassy-time | Instant and Duration for embedded no-std systems, with async timer support | Sets the code execution on an await state for a number of seconds/miliseconds (stops code execution for a predefined time period) |
| embassy-sync | no-std, no-alloc synchronization primitives with async support | Establishes channels used for reading and passing data over ADC |
| embassy-executor | async/await executor designed for embedded usage | Used for spawning/tasking asynchronous functions like main or read_adc_value |
| rp2040-hal | High-level Rust drivers for the Raspberry Silicon RP2040 Microcontroller | Sending PWM Audio over GPIO |
| defmt | defmt ("de format", short for "deferred formatting") is a highly efficient logging framework that targets resource-constrained devices, like microcontrollers. | Logging and Debugging code |
| embedded-time | Fully defined, inter-operable, ergonomic, and fast human-time units (both duration and rate types) with hardware timer abstraction and software timers. | Used for defining the PWM wave's frequency change rate |